Feature guide
Your website, your plans and your payments
Connect your payments account, create the plans you sell, publish your site (with a design or with your own page), connect your domain, read its visits and send forms to your clients.
In this guide
Where it is
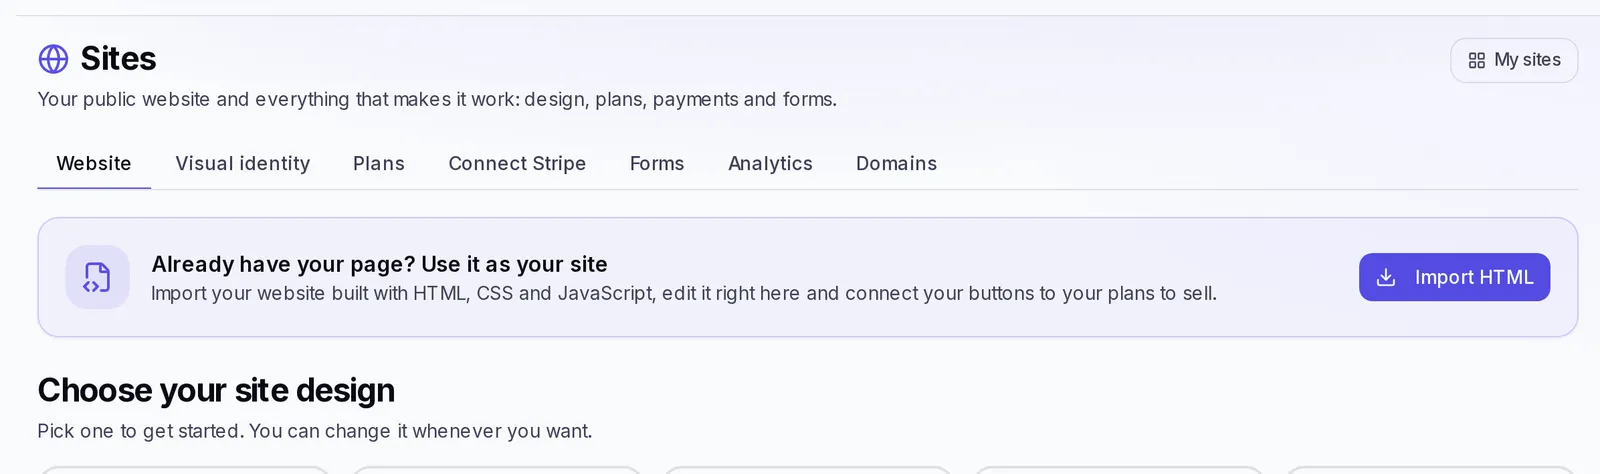
Go to your agency's menu and open Sites. The screen has these tabs:
| Tab | What it's for |
|---|---|
| Website | Choosing your page's design and going in to edit it |
| Visual identity | The logo, colors and font your sites can use |
| Domains | Connecting an address of your own, like shop.youragency.com |
| Forms | Creating forms and sending them to your clients |
| Plans | The plans you sell on your page |
| Connect Stripe | Connecting the account where you receive your clients' payments |
| Analytics | Your site's visits, clicks and sales |
At the top right, My sites takes you to the list of all your sites if you have more than one.
We recommend this order the first time: connect your payments account, create your plans and then publish your site. Without a payments account you can't create plans, and without plans your site can't be published.
Connect your payments account
Your clients pay you directly, into your own Stripe account, at the prices you set. As the screen says, Krellot doesn't take a commission from your payments: it only charges $39/month for each active client.
- In Sites, open the Connect Stripe tab.
- Tap Connect with Stripe. We take you to Stripe's page so you can fill in your business details and your bank account.
- When you finish, you come back to this screen on your own. You'll see "Verifying your account with Stripe…" for a few seconds.
Depending on how it goes, the tab shows you one of these statuses:
- Onboarding in progress: some information is missing. Under Missing: you see what it is; tap Continue in Stripe to complete it.
- Stripe is verifying your account: you've already sent everything. You don't need to do anything else; it usually takes a few minutes.
- Account restricted: Stripe is asking for more information to enable payments. Tap Complete in Stripe.
- Stripe connected, with the Active label: all set. You'll see Payments enabled and Payouts enabled, and the Go to Plans button.
Create plans for your clients
A plan is what a client buys on your site: for example, "Starter, $99 a month". When someone buys a client plan, their client account is created inside your agency.
Open the Plans tab
In Sites, open Plans and tap New plan. If you see "You don't have any plans yet.", you can also tap Create your first plan.
Fill in the plan
- Name: what the plan is called (for example, "Starter").
- Description (optional): who it's for, in one sentence.
- Price (USD) and Interval: Monthly or Annual.
- Setup Fee (USD, optional): a starting payment charged only once along with the first month. Leave it at 0 if you don't charge one.
- Features (one per line): what it includes, one line for each thing. That's how it shows on your page.
- Paid templates included: if you sell paid templates, choose which ones come with the plan.
- Mark as recommended plan: the plan is highlighted on your page. There can only be one.
- Signup form: optional. If you choose one, the client fills it in inside the platform after signing up.
Save the plan
Tap Create plan. The plan shows up in the list with its price. To change it later, use the pencil on its card and Save changes.
To remove a plan, tap the trash can on its card and confirm. Existing subscriptions stay active.
Publish your site
Choose a design
In Sites, Website tab, you'll see Choose your site design. Click any design to open its preview: you can view it on Desktop or Phone and choose whether it uses Design colors or My brand colors. When you like it, tap Use this design.
You can change the design whenever you want. Choosing another one replaces your page, but in the editor you get Bring back the previous one in case you change your mind.
Edit your page
Tap Edit my site. The editor's sections are grouped into Design, Content and Conversion. The ones you'll use most:
- Designer: your page, section by section. Click any element to change its text, image or color, and use Add section or Add a ready-made section to add new parts.
- Branding: your logo, colors, background and font.
- Plans: check which plans show up on your page.
- Footer: your contact email and your social networks.
- SEO: how your page looks on Google and when it's shared.
- Tracking: your Meta pixels, Google Analytics 4 or Google Tag Manager (just the ID number, no code).
- URL: Your website's public address and your own domain.
Your site has a Spanish and an English version: switch languages with the language selector at the top to write the texts for each one. Tap Save to save your changes.
Review and publish
- Tap Review and publish. You'll see how your page looks and the Before publishing list, with what's missing: choosing the design, writing your hero section, uploading your logo, choosing what you sell, adding your contact email, setting your address and turning on payments.
- If something is missing, tap Go fix it.
- When everything is there, tap Publish. If only recommended things are missing, you can tap Publish anyway.
Once it's published, at the top of your agency's screens you'll see Website live with its address, to copy or open it.
Whatever you change afterwards doesn't show until you publish again: the editor warns you with Unpublished changes and the button changes to Review and publish changes. To hide your page, tap Unpublish and confirm with Yes, hide; existing subscriptions aren't affected.
Edit your site with your own code
If you already have your page made in HTML, CSS and JavaScript, you can use it as is as your site and sell from its own buttons.
Import your page
- In Sites, Website tab, look for Already have your page? Use it as your site and tap Import HTML.
- Drag in your .zip file, your folder or your files, or use Choose files or Choose folder. If you have the code copied, tap Have the code copied? Paste it here.
- Tap Import. If you uploaded several pages, choose which one is the main one.
- We tell you what was included and whether any file was missing. Tap Open the editor.
What you import is a draft: nobody sees it until you publish it.
Change what you need
Your page's editor has three modes at the top:
- Edit: click any text, image or button to change it. You can type directly on the page, change an image with Change image, and Hide or Delete an element.
- Test: how your visitors will see it.
- Code: to change the code directly. Tap Save code when you're done.
Connect your buttons and forms
- In the Buttons tab, choose what each button does in On click: Buy a plan (you choose which one), Go to my plans, Open a link or keep What it did on your page. Buttons marked Looks like a buy button are good candidates to connect.
- In Forms, leave Save submissions to Leads on to receive that information in Contacts. The form has to ask for an email.
- In Page, the Show my plans at the end of the page switch adds your plans below your page, only the ones your buttons don't sell yet.
Publish your page
Tap Review and publish. It takes you to the same review as the rest of the sites.
Connect your own domain
You can have your site open at an address of your own, like shop.youragency.com, instead of Krellot's address. Only subdomains can be used: your main domain, your website and your email don't change. If you see "Custom domains aren't available on your account yet." in the tab, this option isn't active for you yet.
- In Sites, open the Domains tab. You'll see each of your sites under Your websites. (You'll also find it in your site's editor, in the URL section.)
- On the site you want, type your subdomain (for example, shop.youragency.com) and tap Connect.
- We show you a record to create. Go to the dashboard where you bought your domain (GoDaddy, Namecheap, Hostinger, Cloudflare…), look for the DNS or DNS Zone section and create a CNAME record with the name and target we give you.
- Wait for the green. We check on our own; when you see Live with a secure certificate, your site already opens on your domain. If you're in a hurry, tap Check again.
It usually takes a few minutes, although some providers take up to a few hours. Your Krellot address keeps working: anyone who goes in through it lands on your domain.
To stop using it, tap Disconnect.
Read your site's analytics
In Sites, Analytics tab, you see how people get to your site. At the top you choose the period (7 days, 30 days or 90 days) and, if you have several sites, which one to see in Site.
- Your website: Visitors, how many Went to pay, New clients and the Conversion.
- Typical time: how long a normal visit lasts.
- Forms submitted: how many people left their details each day.
- What they browse with: Device and Browser.
- Button clicks: how many times your buttons get clicked per 100 visitors.
- Where they come from: which channels people come in from.
- What your clients use: which parts of the platform your clients use. This part always covers your whole agency.
These are total numbers: they don't show information about specific people. To see who left their details, go to Contacts.
Create a form and send it to a client
Forms are for asking your clients for information: a sign-up, a survey or the details to build their brand.
Create the form
- In Sites, open Forms and tap Create form.
- Type the Form name.
- In Describe your form, write the questions or the goal (for example: "I want to sign up restaurants: ask for the business name, email, phone and city") and tap Generate fields with AI. You can also tap Use a template or add fields by hand with Add field.
- Review the Form fields: change the question or the type, check Required or remove whatever's extra.
- If you want, choose a Completion deadline (from 24 hours to 2 weeks). With a deadline, the form becomes mandatory and we let you know if the client doesn't complete it in time.
- Tap Publish, or Save draft to finish it later.
Send it to a client
- In the forms list, hover over the form and tap Send to client.
- In Pick a client, select who.
- Tap Send. Your client gets a notification and an email to complete it.
If the client already had that form pending, we send them a reminder. You can also send a form from a client's profile, with Send form. Only the agency's owner can send forms.
To have every new client who buys from you fill it in, choose it as the Signup form of a plan (see Create plans for your clients).
Read the responses
Tap View responses on the form. Each client shows up as Completed, Pending or Overdue, and you can download them with Export CSV.
Have several sites
If you need a different page for another type of client, tap My sites and then New site. Each site has its own design, its own address and its own domains. From that list you can Configure, Clone or Delete each site; at the top you see how many sites you have left on your plan.
To delete a site, first unpublish it and disconnect its own domain. Your Primary site can't be deleted.
If something goes wrong
- "Missing to publish:": read the list and fix each item. The most common causes are that your payments account is still being verified or that you haven't chosen any plan in the editor's Plans section.
- You can't create a plan: first connect your payments account in Connect Stripe. If it's already connected, remember that only the agency's owner can create plans.
- Your changes don't show on your site: you have Unpublished changes. Tap Review and publish changes.
- Your domain is stuck on "Waiting for your domain to point here": check that the CNAME record has exactly the name and target we gave you, and tap Check again.
- "Custom domains aren't available on your account yet": you can't connect domains yet.
- "What you uploaded is too large" when importing your page: compress your images or upload it as a .zip.